Selective Colour Editing in Photography: The Complete Guide to Targeted Colour Adjustments, HSL Masking, Colour Range Selections, Muting Backgrounds, Enhancing Specific Hues, and Creating Powerful Colour-Focused Images
Selective colour editing is the practice of adjusting specific colours within an image independently — changing, enhancing, muting, or shifting one colour without affecting the others. This technique gives photographers precise control over the palette of every photograph, allowing you to warm the golden tones in a sunset without altering the blue sky, deepen the green of foliage without shifting skin tones, mute distracting background colours while keeping the subject vibrant, or convert the entire image to black and white except for one vivid colour accent. Selective colour editing ranges from subtle corrective adjustments (fixing a colour cast that only affects one hue range) to dramatic creative effects (desaturating everything except a single colour), and mastering it is essential for creating polished, intentional images with carefully controlled palettes.
The tools for selective colour editing exist at every level of photographic software. In Lightroom and Camera Raw, the HSL panel provides the primary controls — three sliders (Hue, Saturation, Luminance) for each of eight colour ranges (Red, Orange, Yellow, Green, Aqua, Blue, Purple, Magenta). In Photoshop, the Selective Colour adjustment layer, the Hue/Saturation adjustment with targeted colour ranges, and Colour Range selections provide more precise and powerful selective colour capabilities. This guide covers all of these tools with practical applications for portrait, wedding, landscape, and editorial photography.
HSL Panel: The Foundation of Selective Colour
The HSL (Hue, Saturation, Luminance) panel in Lightroom and Camera Raw is the most frequently used selective colour tool for photographers. Each colour range has three controls: Hue shifts the colour itself (pushing Orange towards Red makes skin warmer and more rosy, pushing it towards Yellow makes skin more golden), Saturation increases or decreases the colour intensity (reducing Green Saturation mutes foliage, increasing Blue Saturation deepens skies), and Luminance controls the brightness of that colour range (increasing Orange Luminance brightens skin, decreasing Blue Luminance darkens skies). The Targeted Adjustment Tool (the crosshair icon) lets you click directly on any colour in the image and drag up or down to adjust that colour range intuitively.
Effective selective colour editing with the HSL panel starts with identifying the problem or vision. For portrait photography, the most common adjustments are: reducing the saturation and shifting the hue of background greens to create a softer, less visually competing backdrop (Green Saturation -20 to -40, Green Hue shifted slightly towards Yellow for a warmer, more muted tone); warming skin by adjusting the Orange channel (Orange Hue -3 to -5 towards Red, Orange Saturation +5 to +10, Orange Luminance +5 to +10 for brighter, warmer skin); and deepening or desaturating reds depending on whether red elements in the image (lips, flowers, clothing) should be more or less prominent. These adjustments, applied consistently, create a polished, intentional colour palette that separates professional photography from amateur snapshots.
Photoshop Selective Colour Adjustment Layer
The Selective Colour adjustment in Photoshop operates differently from HSL — instead of adjusting Hue, Saturation, and Luminance, it adjusts the CMYK (Cyan, Magenta, Yellow, Black) components within each colour range. This provides a different type of control that is particularly effective for colour correction and fine-tuning. For each target colour (Reds, Yellows, Greens, Cyans, Blues, Magentas, Whites, Neutrals, Blacks), you can add or remove Cyan, Magenta, Yellow, and Black. For example, selecting "Reds" and reducing Cyan makes red tones warmer, while adding Magenta to "Yellows" pushes yellow tones towards orange.
The Selective Colour adjustment is especially powerful for skin tone refinement. Select "Reds" and adjust the Cyan, Magenta, and Yellow sliders to shift the red component of skin colour; then select "Yellows" (which typically captures the majority of skin colour information alongside Reds) and make complementary adjustments. The "Neutrals" target affects the midtone greys in the image, providing a way to add a subtle colour cast to the neutral areas without affecting the vivid colours. The "Blacks" target affects the deepest shadows, allowing you to add warmth or coolness to just the shadow tones — a powerful colour grading technique that creates the warm shadows or cool shadows look popular in modern wedding and portrait photography.
Colour Range Selections and Hue/Saturation Masking
For more precise selective colour editing, Photoshop's Select → Colour Range command creates a selection based on a specific colour or colour range that you sample from the image. Click on the colour you want to target, adjust the Fuzziness slider to control how wide a colour range is included (low fuzziness = narrow, precise selection of very similar colours; high fuzziness = broader selection that includes more colour variation), and use the Add to Sample and Subtract from Sample eyedroppers to refine the selection. The resulting selection can be applied as a layer mask to any adjustment layer, restricting the adjustment to only the sampled colour range.
The Hue/Saturation adjustment layer in Photoshop also provides targeted colour editing with the colour range dropdown at the top of the dialog. Selecting "Reds," "Yellows," "Greens," "Cyans," "Blues," or "Magentas" restricts the Hue, Saturation, and Lightness adjustments to that colour range. The colour range bars at the bottom of the panel can be dragged to narrow or widen the affected range, giving you more precise control over exactly which colours are affected. For example, you can narrow the "Greens" range to affect only the bright lime-green of spring foliage without touching the darker olive-green of evergreens, or narrow "Blues" to affect only the sky blue without altering the darker blue of a jacket.
Muting Backgrounds and Enhancing Subjects
One of the most effective uses of selective colour editing is muting distracting background colours to draw attention to the subject. In outdoor portrait photography, vivid green grass and foliage, bright blue sky, and colourful elements in the background compete with the subject for the viewer's attention. By selectively desaturating and darkening the greens and blues (reducing Green and Aqua Saturation by 20–40 percent and reducing their Luminance by 10–20 percent), you create a softer, more muted backdrop that makes the subject stand out as the most vibrant element in the frame. The effect should be subtle — viewers should not notice that the colours have been adjusted, only that the subject draws their eye.
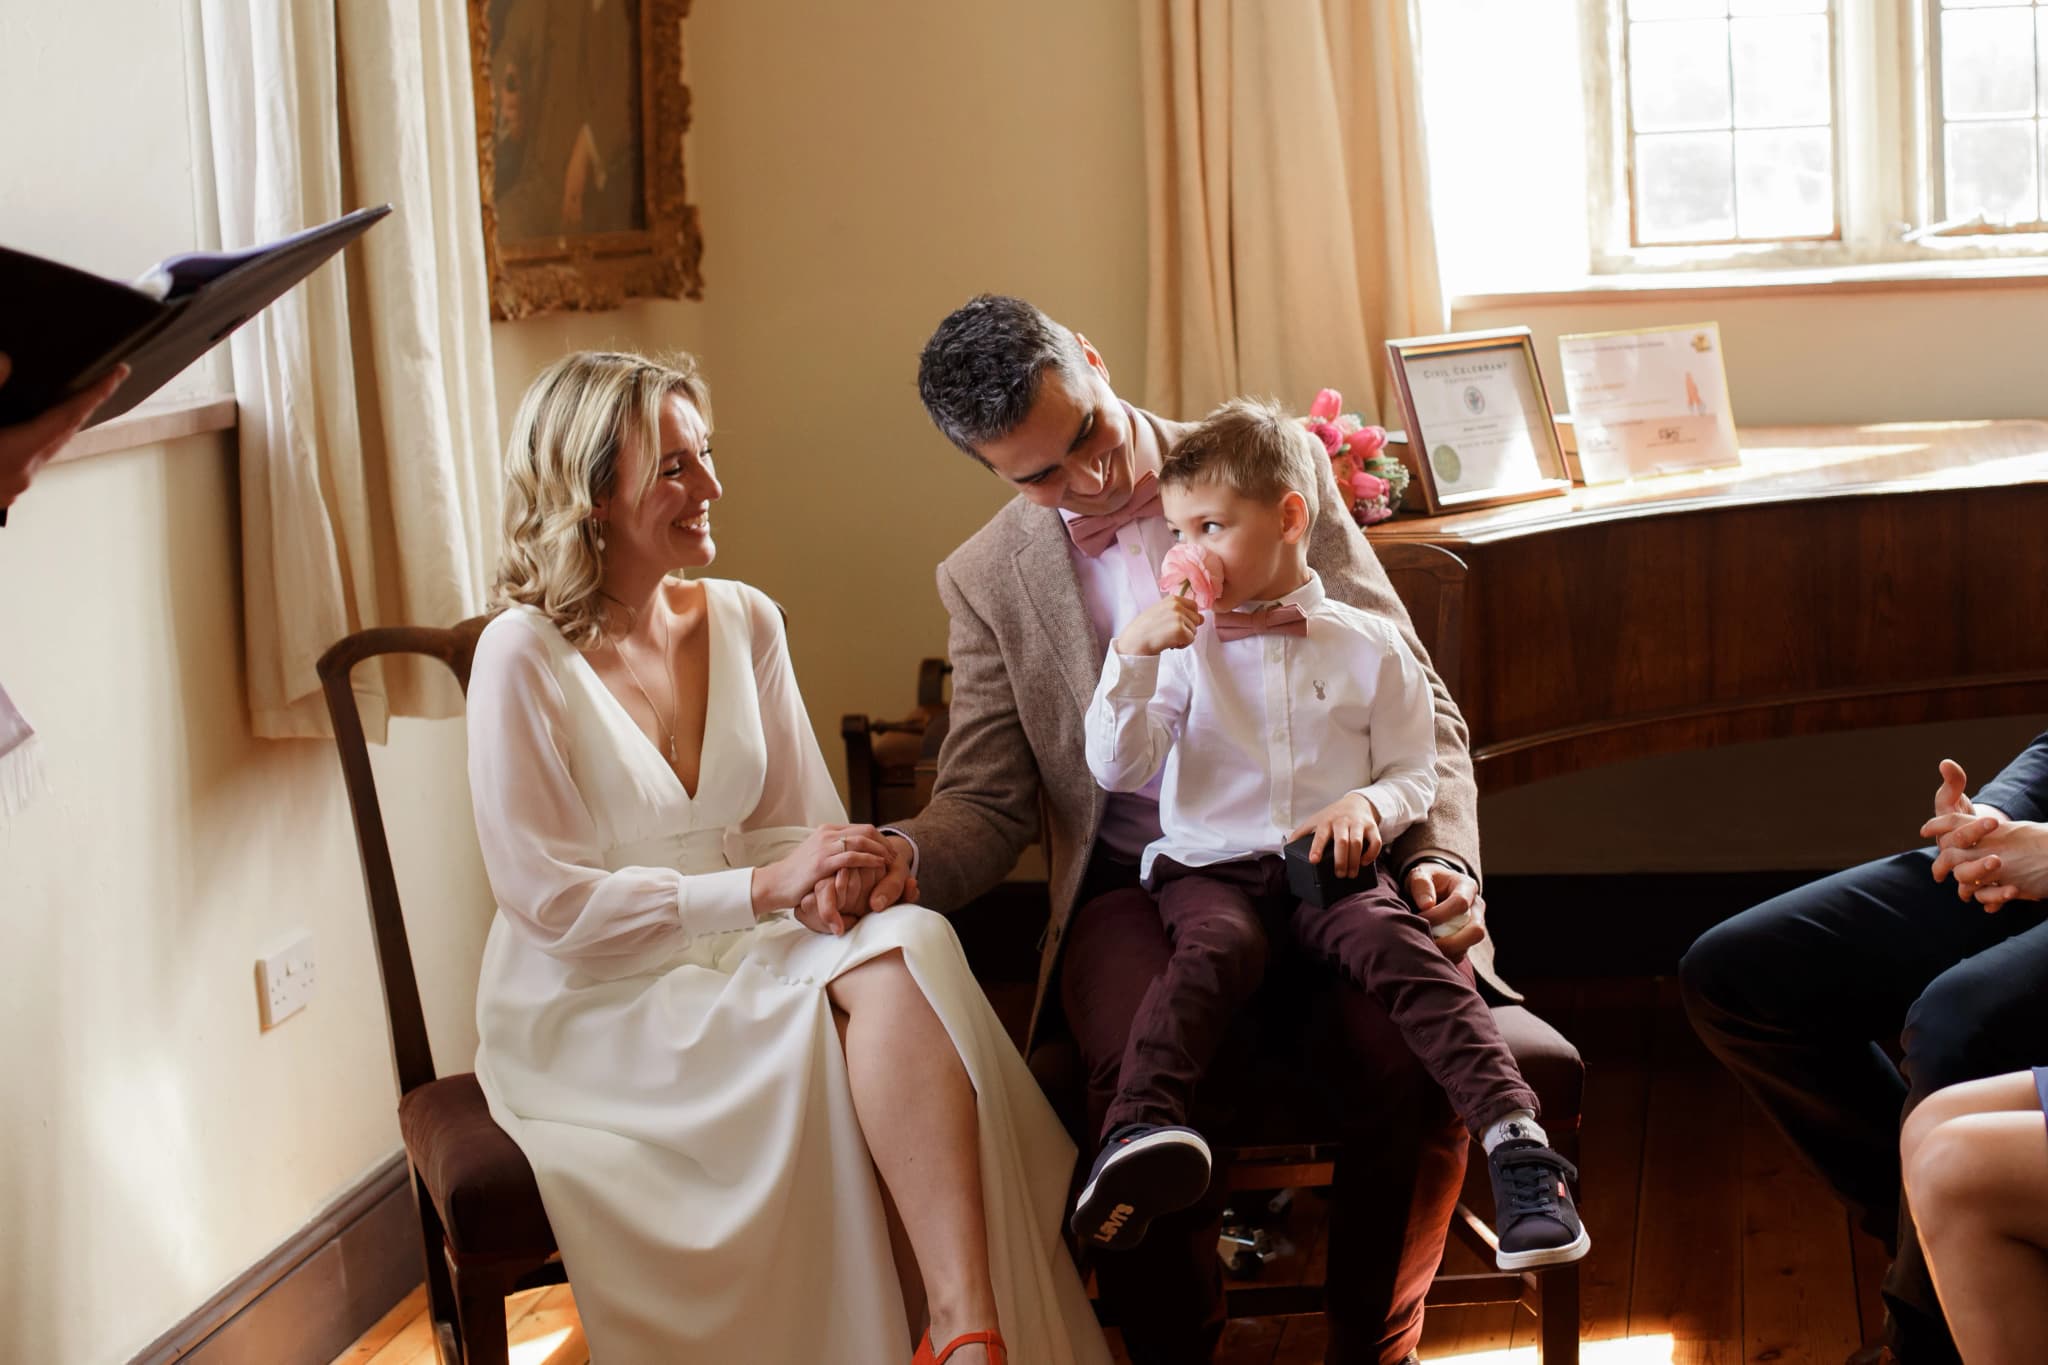
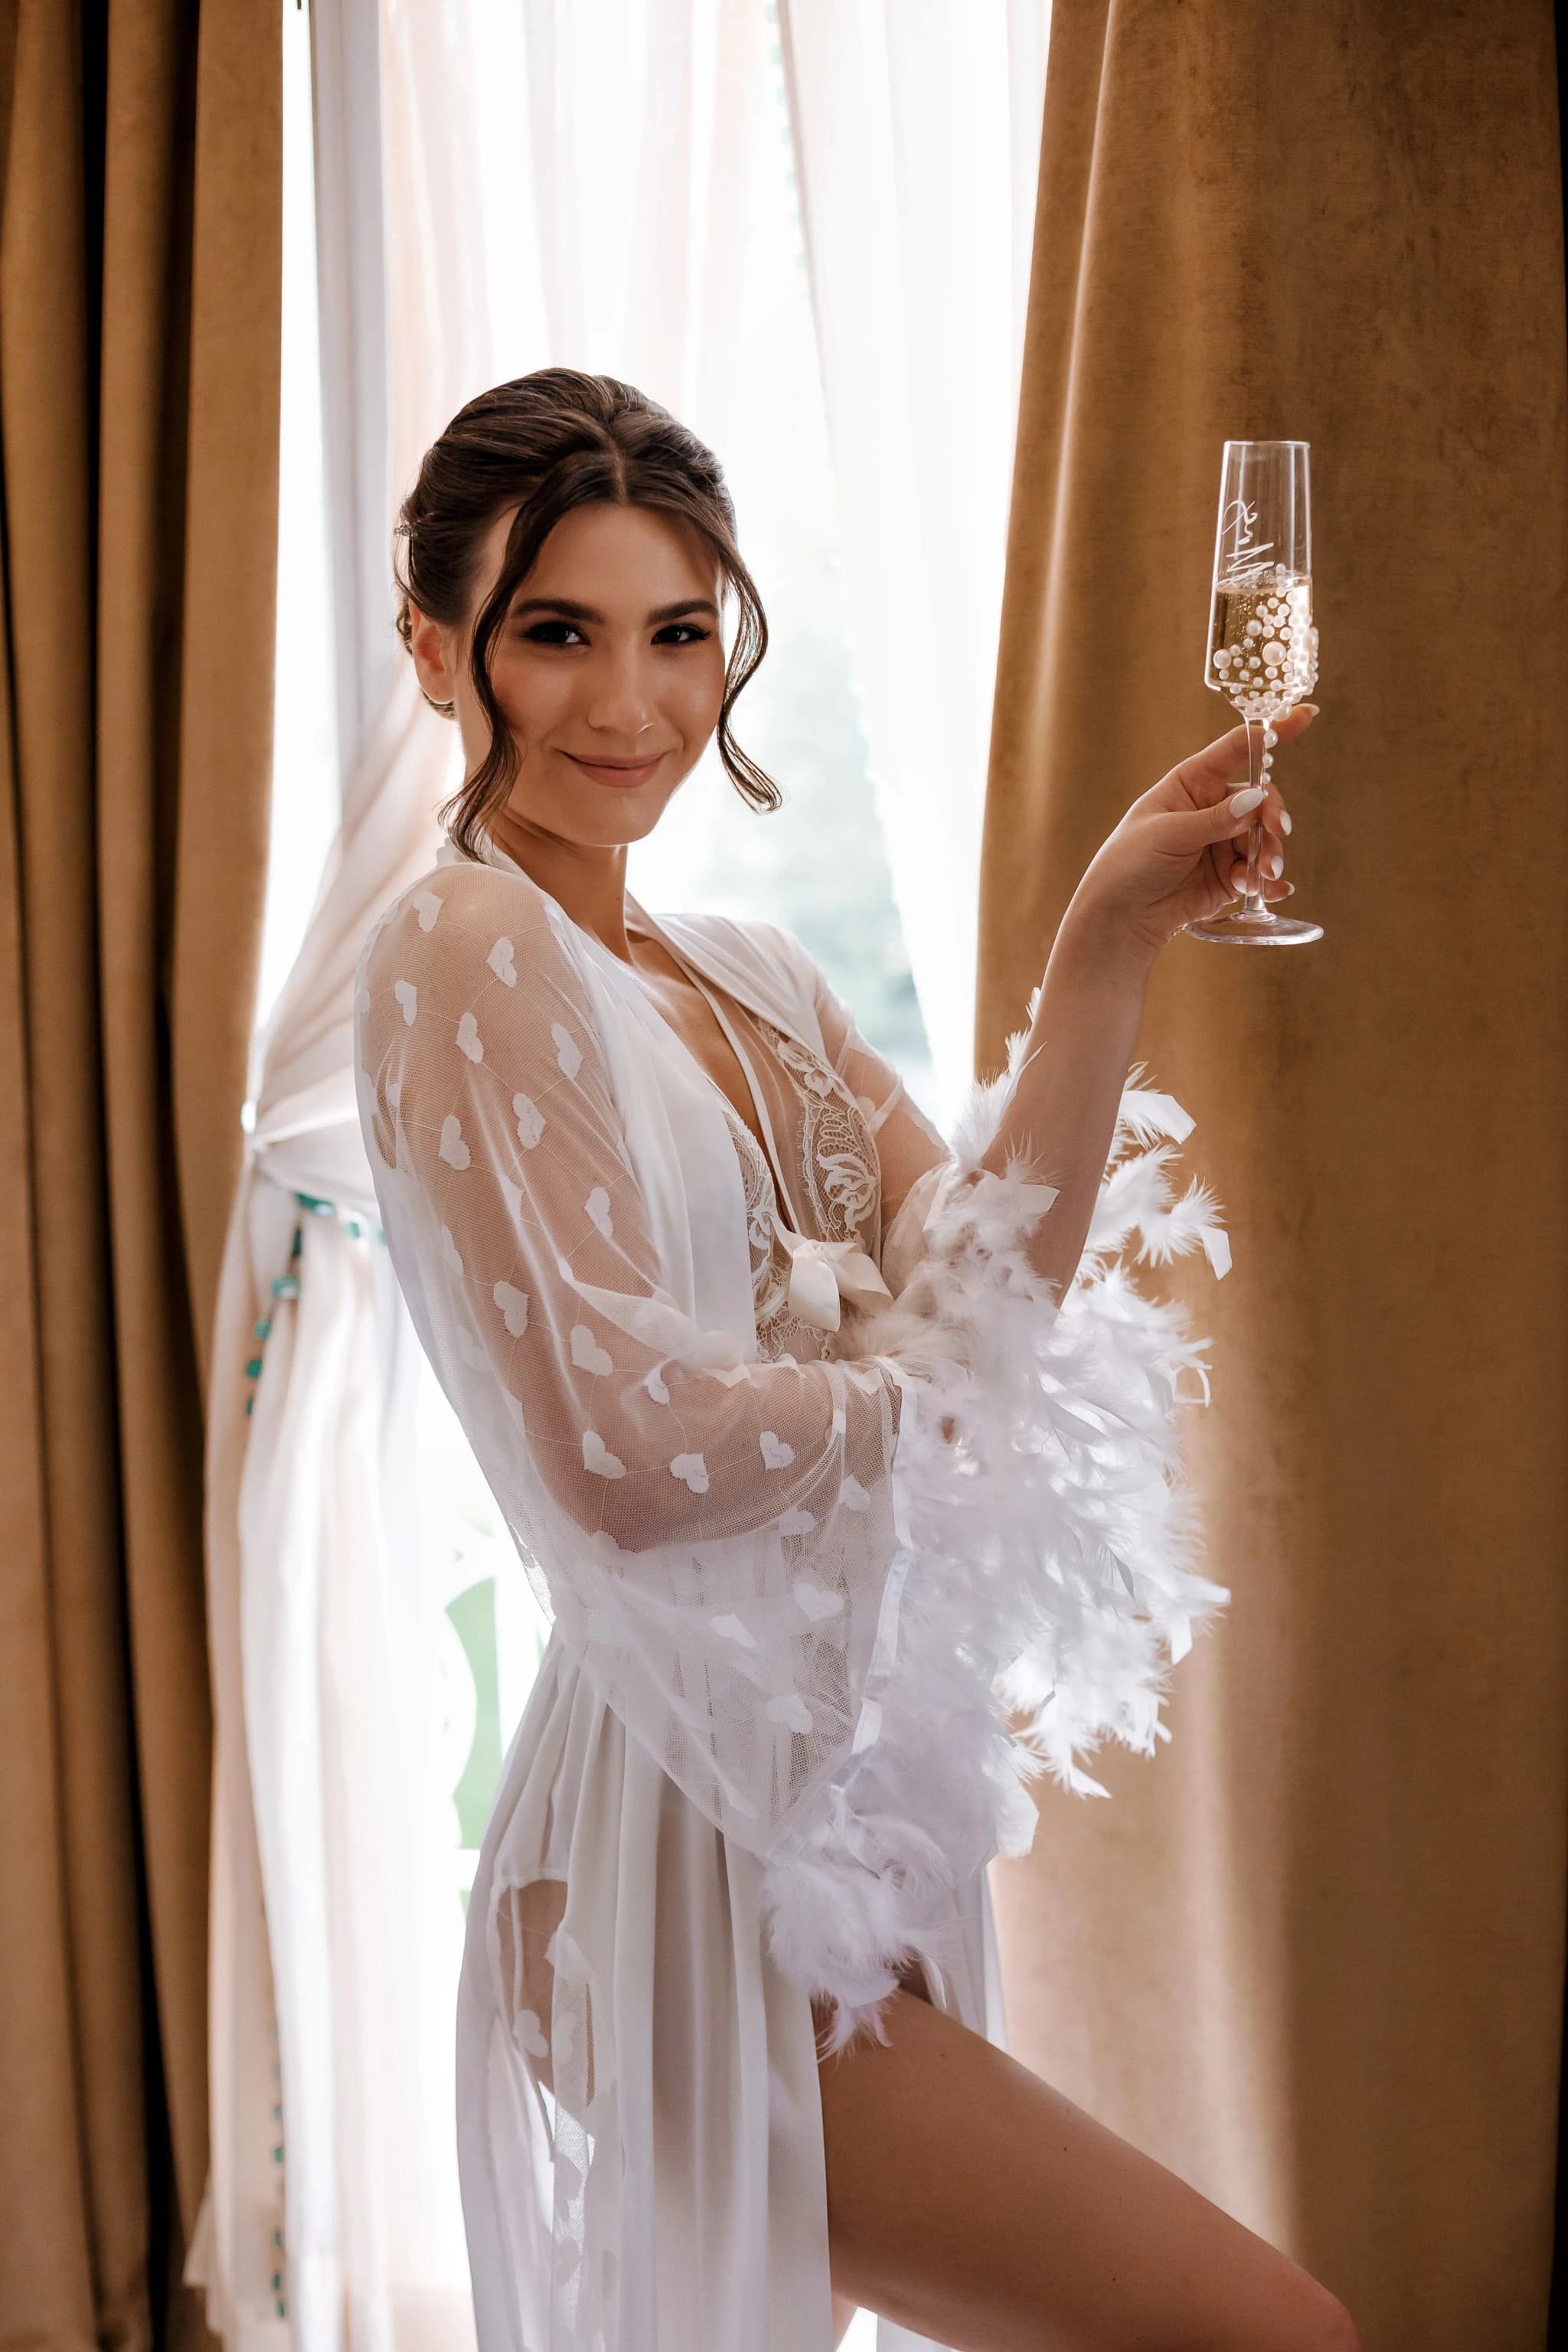
Conversely, selectively enhancing the subject's colours can amplify their visual presence. For a bride in a white dress against a green garden, you might desaturate the greens while increasing the warmth (Orange and Yellow luminance) on the skin, creating a natural but powerful contrast between the vibrant subject and the subdued background. For a couple with a colourful bouquet, you might boost the Reds and Magentas of the flowers while muting the surrounding environment, making the bouquet a vivid focal point. These selective colour techniques are the professional photographer's equivalent of cinematic colour grading — controlling what the viewer notices first by controlling the colour palette.
Carefully Crafted Colour in Every Photograph
Every image I edit receives careful attention to colour — ensuring your skin looks warm and radiant, backgrounds complement rather than compete, and every photograph has a polished, intentional palette.
Experience beautifully colour-graded photography — get in touch today →