Yana Skakun

Groom Posing Guide: How to Look Confident, Not Stiff
By Yana Skakun·10 June 2026·6 min read
Almost every groom I've photographed across Cambridgeshire and Suffolk says the same thing in the first ten minutes: 'I never know what to do with my hands.' If that sounds like you, breathe easy. Looking confident in front of the camera is not about being a model. It's about a handful of small physical habits that quietly read as relaxed and self-assured. This groom posing guide walks you through the stance, the hands and the expression so you turn up to your wedding portraits already knowing what good feels like.
Start From the Ground: Stance Sets the Tone
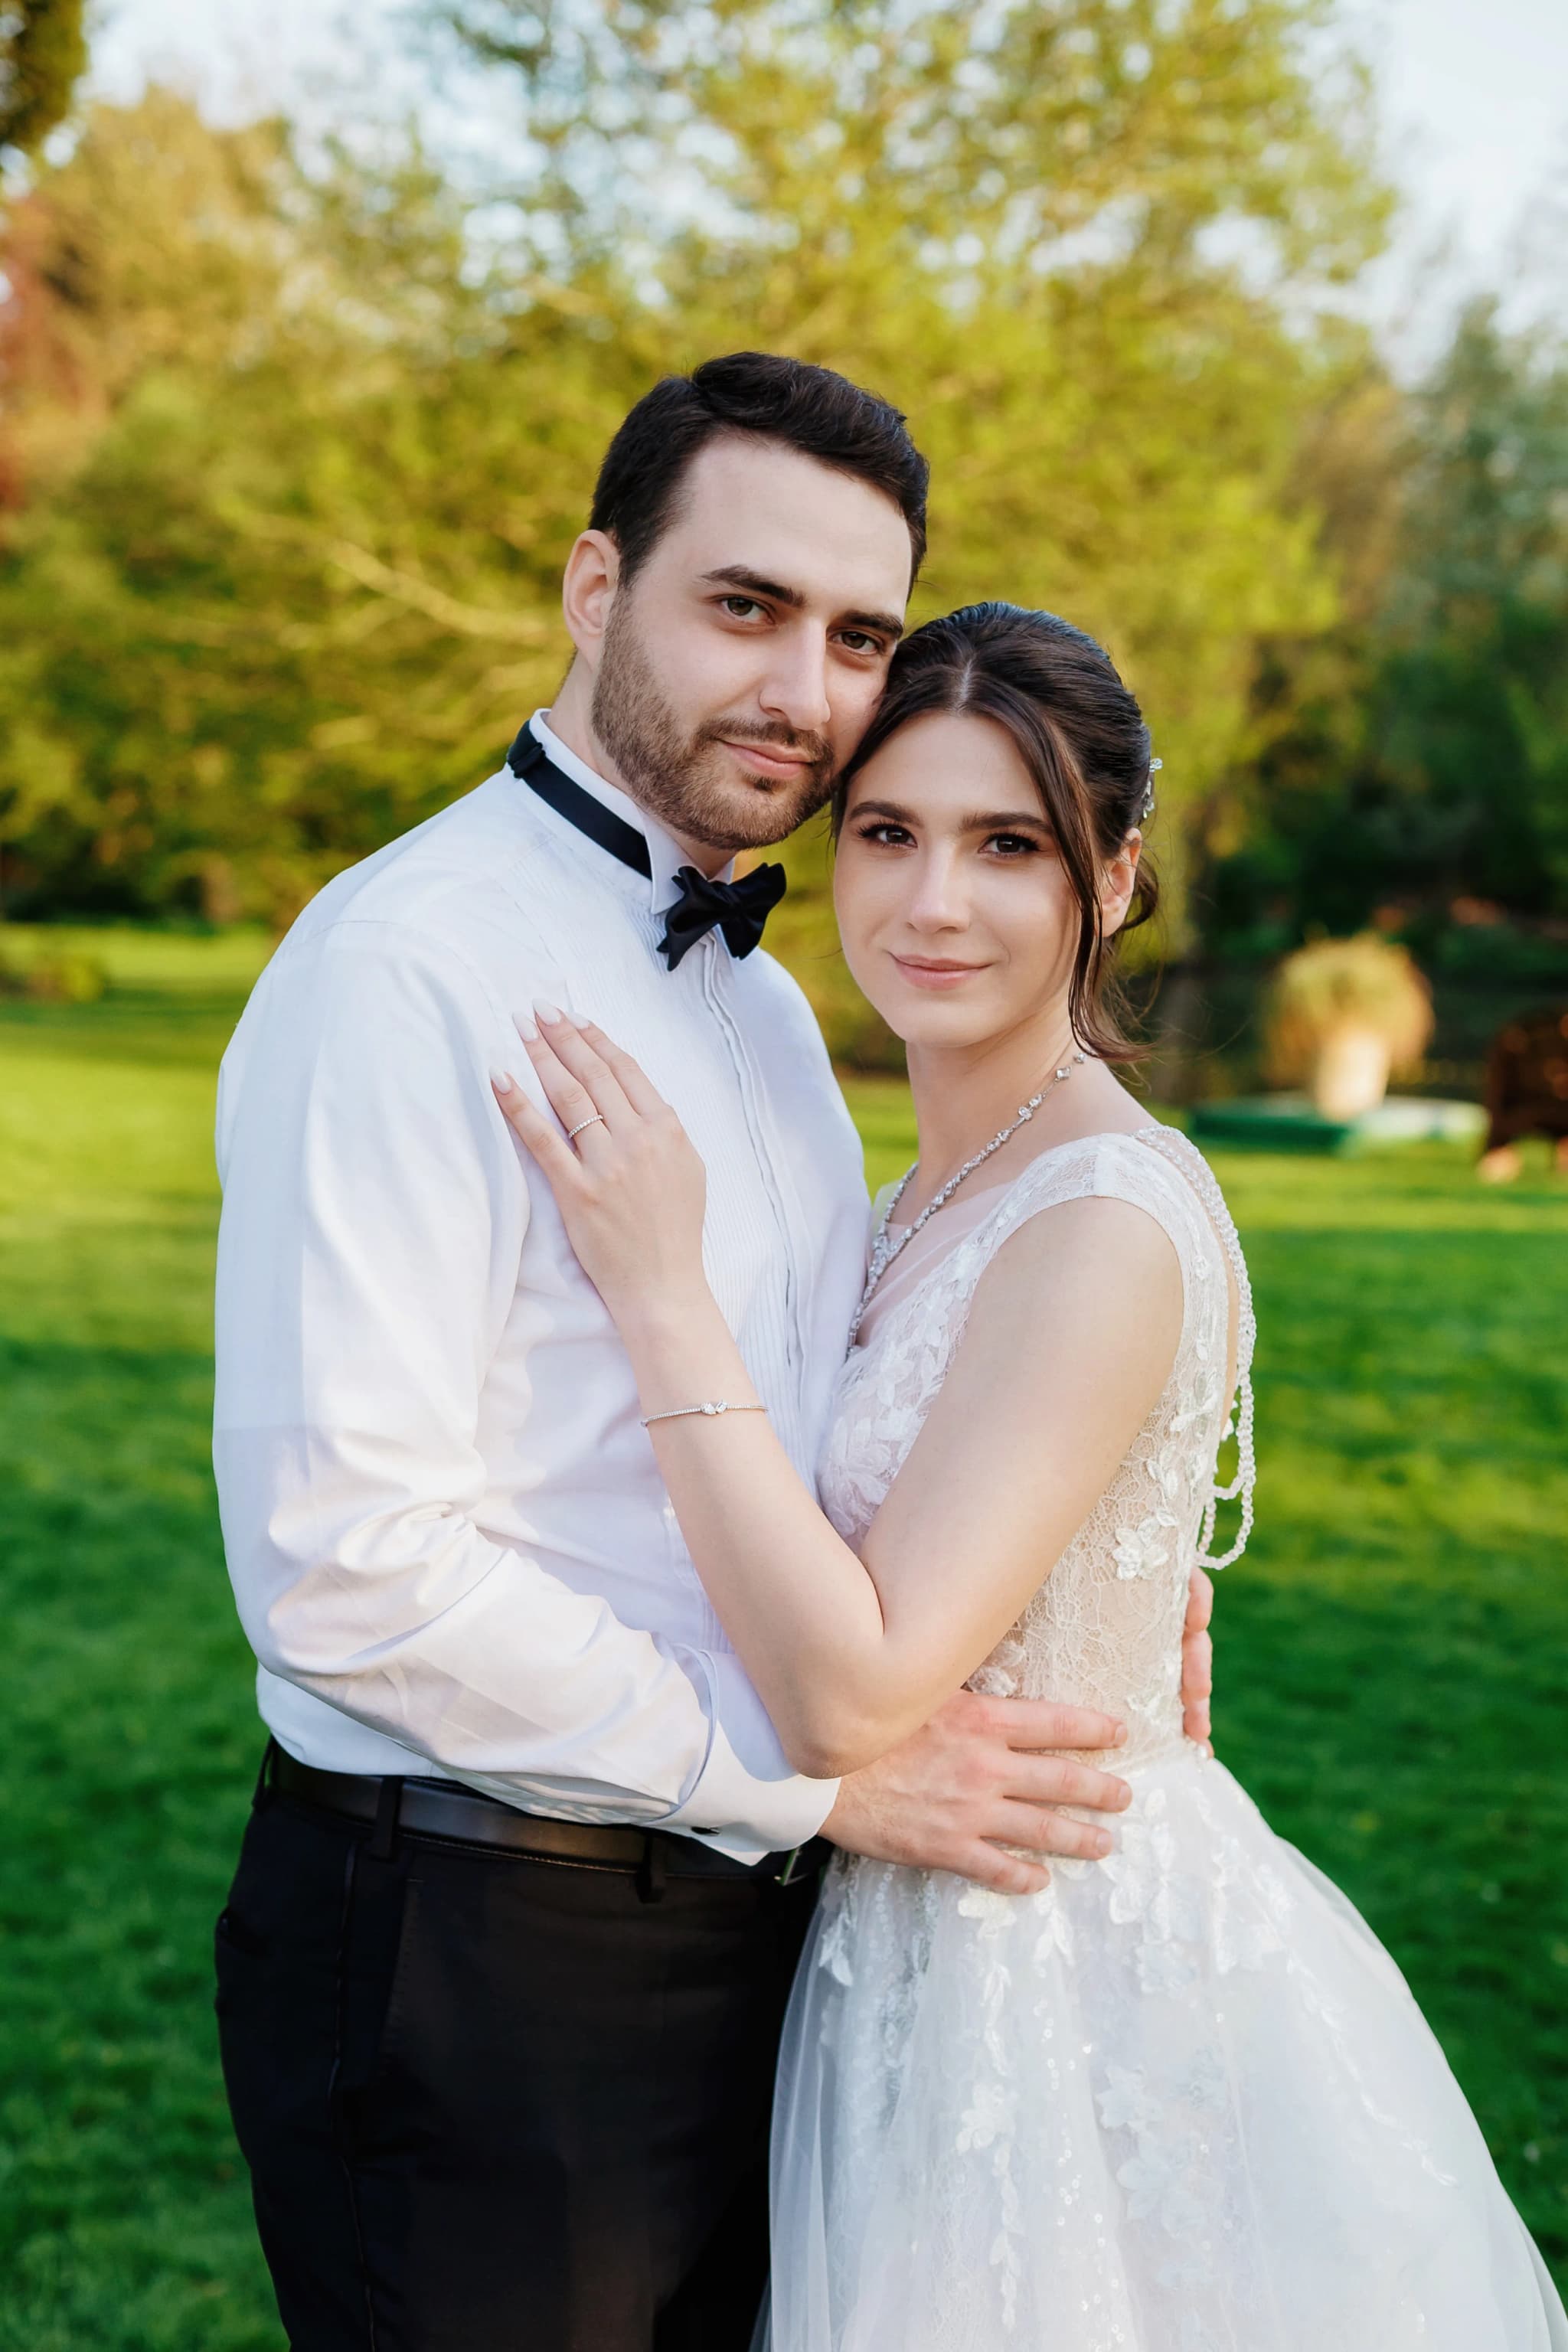
Everything begins with your feet, because a stiff body almost always starts with locked legs. When grooms feel nervous they tend to stand square-on with their weight planted evenly, knees rigid, and that flat, frozen look travels all the way up to the shoulders. The fix is gentle: shift most of your weight onto your back foot and let the front knee soften. Instantly your hips drop into a more natural line and your whole frame loses that 'passport photo' rigidity.
Angle your body roughly fifteen to thirty degrees away from the lens rather than facing it head-on. A slight turn slims the silhouette of a suit, gives definition to the shoulders, and stops you looking like you're queuing at passport control. I'll usually ask grooms to turn their toes toward me but keep their chest angled away, which creates a relaxed twist through the torso that the camera loves.
One more thing on stance: don't lock your knees back. It's the single most common cause of that wooden, tin-soldier feel. A barely bent knee keeps you looking alive and ready to move, which matters because the best groom portraits often happen between poses, not during them.
The Hands Problem, Solved Properly
Hands are where most grooms come undone, so let's give them a job. The trick is that idle hands look anxious, but hands with purpose look effortless. Your suit is full of natural anchor points, and using them is the fastest route to a calm, deliberate pose. The key is to keep the gesture light. Fingers should rest, not grip, and you should always be able to wiggle them freely.
- ◆Jacket button: Do up the top button and rest a hand near it. Instantly tidies the jacket line and gives the hand a confident home.
- ◆Pocket, thumb out: Slide a hand part-way into a trouser pocket and leave the thumb hooked outside. Casual, but never sloppy.
- ◆Cuff adjust: Reach across and lightly tug a shirt cuff. It reads as a small, purposeful action and looks brilliant mid-movement.
- ◆Lapel hold: Pinch the edge of the lapel between thumb and finger. A classic, dapper gesture that suits tailored three-piece suits.
- ◆Hands in pockets: Both hands loosely pocketed, thumbs out, shoulders dropped. The most relaxed option for candid, walking shots.
- ◆Watch or ring: Glance down and touch your watch or wedding band. A genuine action that creates a quiet, contemplative frame.
Cycle through two or three of these and you'll never be caught with dangling, awkward hands again. I tend to call them out one at a time on the day so you're never standing there guessing, and we keep the energy moving.
Shoulders, Chin and the Lean
Confidence lives in the upper body, and the cheapest upgrade you can make is simply dropping your shoulders. Nerves pull them up toward the ears; a slow exhale lets them fall, your neck lengthens, and you immediately look more grounded. I'll often ask grooms to roll their shoulders back and down once before a shot, which resets the whole posture.
The chin matters too. Push it very slightly forward and down rather than tucking it back into your neck. It sounds odd, but extending the chin a touch defines the jawline and avoids the dreaded double-chin that head-on shots can create. Pair that with a slight lean toward the camera, leading with your forehead, and the portrait gains a sense of engagement and presence.
Leaning on something helps enormously. A doorway at a Cambridgeshire barn, a stone wall at a Suffolk manor, the bonnet of the wedding car. Resting a shoulder or forearm against a surface gives you a reason to relax your weight and instantly reads as casual confidence rather than posed stiffness.
Expression: The Real Secret to Looking Confident
You can nail every physical cue and still look tense if the face freezes, so expression is where I spend the most care. A forced grin held for too long becomes glassy and strained. The answer is to keep your face moving. I'll crack a joke, ask about your stag do, or get you to look away and back, because a genuine reaction always beats a posed smile.
Not every great groom portrait is a beaming grin, either. Some of my favourites are the quiet, serious ones: a soft look just off-camera, lips closed, eyes thoughtful. To find that expression, try a slow breath out through slightly parted lips and let your jaw relax. It softens the whole face and removes that clenched tension grooms carry without realising.
And when you do laugh, let it be real. The half-second after a genuine laugh, as the smile settles, is pure gold. That's the frame that ends up on the wall, and it only happens when you're relaxed enough to forget the camera is there.
Practice Before the Big Day
None of this needs to be daunting. Spend five minutes in front of a mirror the week before: shift your weight, try a hand position, drop your shoulders, breathe out. You're not rehearsing a performance, you're building muscle memory so the cues feel familiar when the nerves and adrenaline of the morning kick in. Grooms who do this always settle faster in front of the lens.
Most importantly, trust your photographer to guide you. On the day my job is to talk you through every step, watch the light, and catch the in-between moments so you never have to hold an awkward pose. The UK weather rarely cooperates fully, so we'll work with what we get, and a relaxed groom looks brilliant in soft cloud or golden Suffolk sun alike.
Getting married in Cambridgeshire or the surrounding counties?
I'll guide you through every pose on the day so you look confident and completely yourself. Let's have a chat about your wedding and see if your date is free.
Check Your Date →


Yana Skakun
Photographer · England
Professional wedding, family and portrait photographer based in England. Passionate about capturing authentic emotions and timeless moments.
About Yana →groomposingguideconfident
Photography Guide — Professional Photography in Cambridge & England
Yana Skakun is a professional photographer based in Cambridge, covering weddings, families, and portraits across England. Every session is personal — planned around your story, your people, and the moments that matter most. This guide — Groom Posing Guide: How to Look Confident, Not Stiff — is part of the photography journal: practical, experience-based advice drawn from real sessions across England. Whether you arrived searching for groom or posing, the same care and attention shapes every session Yana photographs.
Professional Photography sessions are available year-round, with bookings open across Cambridge, Ely, Huntingdon, Peterborough, and further afield — East England, London, the Midlands, and beyond. If you have specific questions about guide, mention it in your enquiry. Get in touch through the contact form above to check availability and discuss your session. Enquiries are welcomed from anywhere in the UK.
Frequently Asked Questions
What camera settings should I use for outdoor portraits?+
For outdoor portraits, shoot in aperture priority mode. Use a wide aperture (f/1.8–f/2.8) to blur the background and isolate your subject. Keep ISO as low as possible in good light. In bright conditions, use a neutral density filter or switch to manual to avoid overexposure at wide apertures.
What is the golden hour in photography?+
Golden hour is the period roughly 30–60 minutes after sunrise and before sunset. The sun is low in the sky, producing warm, soft, directional light that flatters skin tones and creates beautiful long shadows. It's widely considered the best natural light for portrait and outdoor photography.
How do you get sharp photos in low light?+
In low light, increase your ISO (accepting some grain), use the widest aperture your lens allows, and slow your shutter speed to the slowest you can hand-hold without camera shake (roughly 1/focal length as a guide). Use image stabilisation if available, and consider a tripod for static subjects.
What is the rule of thirds in photography?+
The rule of thirds divides the frame into a 3×3 grid. Placing your subject on one of the four intersection points — rather than dead centre — creates a more dynamic, visually interesting composition. It's a guideline, not a rule: some of the most powerful images break it deliberately.
How do you edit photos to look professional?+
Professional editing starts with shooting in RAW format. In Lightroom or similar software, correct exposure, white balance, and contrast first. Recover shadow and highlight detail. Apply gentle colour grading for mood. Be conservative with skin retouching — the goal is natural enhancement, not transformation. Consistency across a set of images is what separates professional from amateur editing.
Continue Reading
Related Articles


Get in Touch
Ready to Book Your Session?
Get in touch to discuss your vision — I'll reply within 24 hours.