Yana Skakun

How to Avoid a Double Chin in Your Wedding Photos
By Yana Skakun·10 June 2026·6 min read
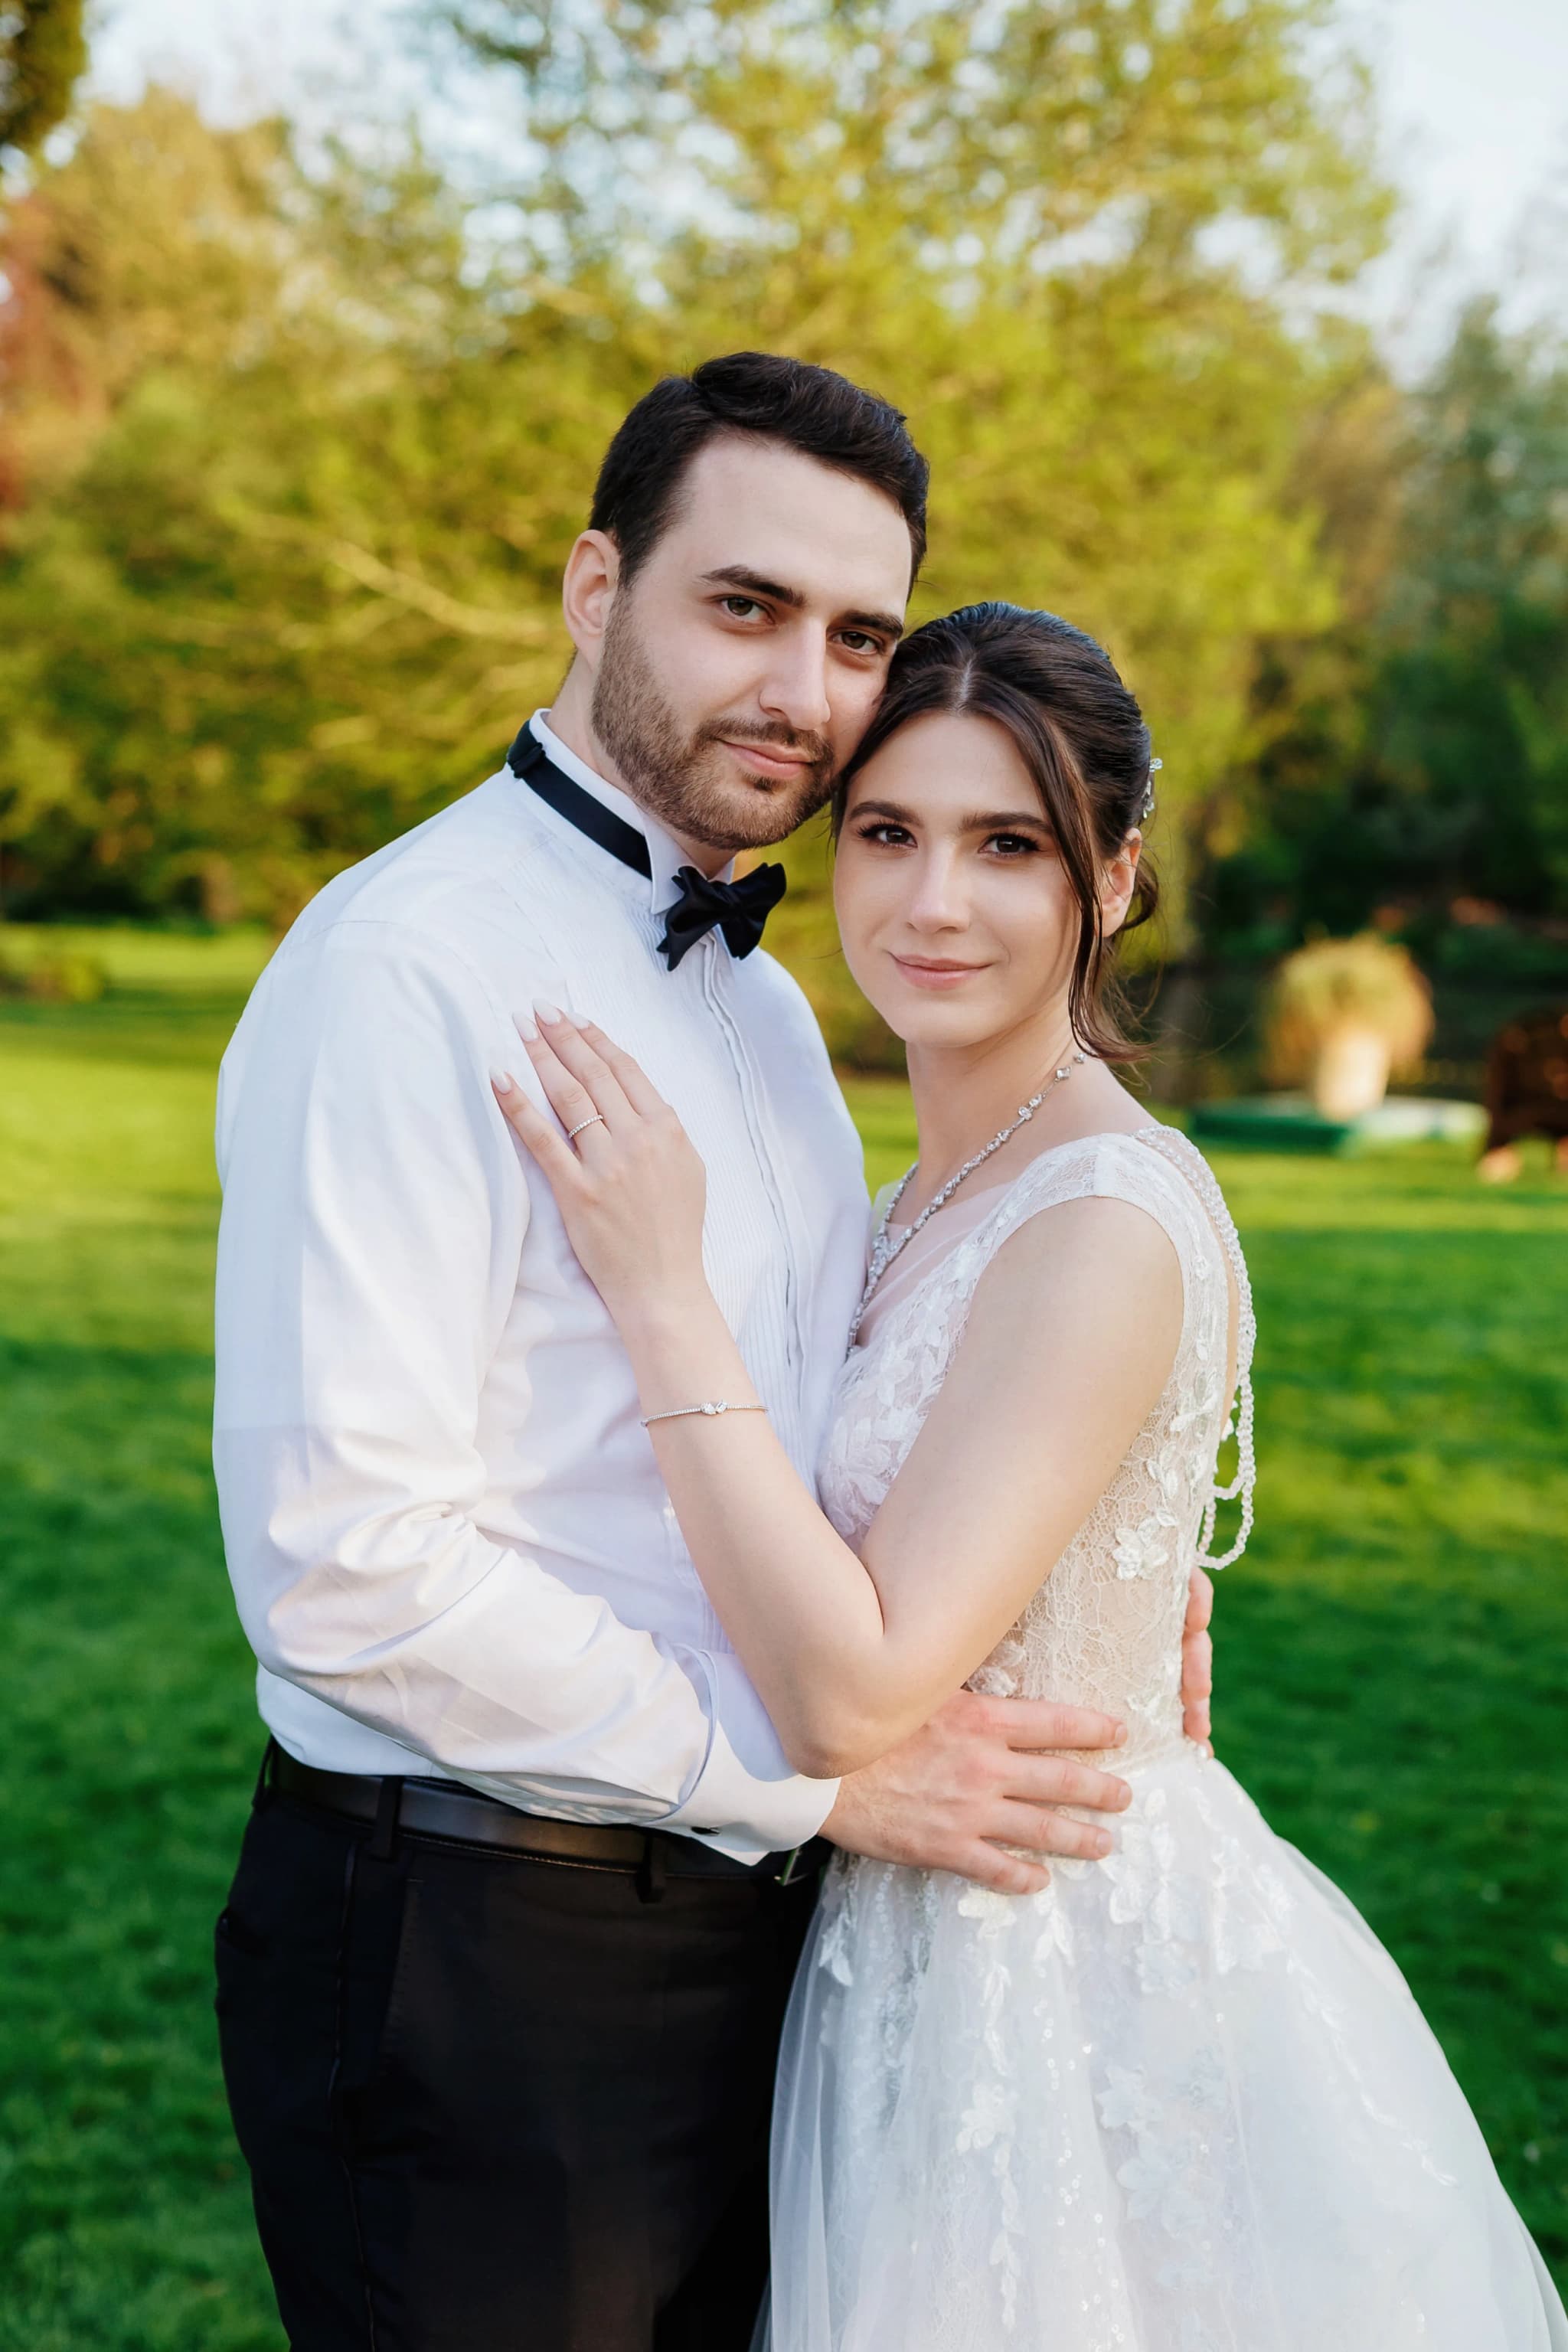
If there's one worry I hear more than any other before a wedding, it's this: "Please don't make me look like I have a double chin." I've photographed weddings across Cambridgeshire and Suffolk for years, and I promise you, a softer jawline on camera has almost nothing to do with your face and everything to do with posture, angle and a few small habits you can learn in five minutes.
Why a Double Chin Appears in Photos (and Why It Isn't About Weight)
A double chin in a photograph is usually an optical illusion created by compression. When your chin tucks back towards your neck, the skin and soft tissue beneath the jaw bunch together, and a wide-angle lens held slightly above eye level exaggerates it. The slimmest people in the world get this effect if the angle is wrong, which is exactly why you'll spot it in candid phone snaps far more than in proper portraits.
The good news is that understanding the cause hands you the solution. We're not hiding anything. We're simply lengthening the distance between your jaw and your neck so the camera reads a clean, defined line. Knowing how to avoid a double chin in photos is really just knowing how to present your jaw to the lens, and that's a skill, not a body type.
The One Move That Changes Everything: Forehead Forward
The single most effective trick I teach every couple is what I call "forehead forward, then down." Instead of lifting your chin (which strains the neck and looks unnatural), you push your forehead gently towards the camera and tilt it down a fraction. This stretches the jawline away from your throat and creates definition without that startled, chin-up look.
It feels deeply strange the first time. Most people tell me they feel like a tortoise leaning out of its shell, and that's precisely the sensation you're after. On camera it reads as relaxed, engaged and elegant. We'll practise it together at the start of your couple session, usually somewhere quiet like the gardens at Madingley Hall, until your body remembers it on its own.
Posture Habits That Define Your Jaw on Camera
Posture does most of the heavy lifting long before I press the shutter. A collapsed chest and rounded shoulders push the chin down into the neck; an open, lifted posture pulls everything back into a flattering line. These are the cues I give couples again and again, and they work for everyone regardless of height, build or which side they think is their "good" side.
- ◆Shoulders down and back: Roll your shoulders up, then drop them away from your ears. A long neck instantly sharpens the jawline.
- ◆Lengthen the spine: Imagine a thread pulling the crown of your head towards the ceiling. Tall posture stretches everything, including your chin.
- ◆Weight on the back foot: Shifting your weight back and angling your body slightly away from the lens slims the whole frame, jaw included.
- ◆Tongue to the roof of your mouth: Pressing your tongue gently behind your top teeth tightens the muscles under the chin. Odd, but it genuinely works.
- ◆Turn, don't face square: A three-quarter turn so one shoulder is closer to me carves a defined jaw rather than a flat, head-on view.
- ◆Breathe out on the click: A held breath tenses the neck. A soft exhale relaxes the face and softens any strain around the jaw.
How the Right Photographer and Angle Do the Work for You
Here's the part most couples don't realise: a good wedding photographer is managing your jawline constantly, and you should never have to think about it on the day. I shoot the vast majority of portraits from at or slightly below eye level, never looking down at you. A camera held high is the fastest way to manufacture a double chin, which is why so many guests' phone photos disappoint while the professional images don't.
Light matters just as much as angle. Soft directional light, the kind you get on an overcast Suffolk afternoon or in the shade of a Cambridge college courtyard, sculpts the face gently and lets the jaw catch a subtle shadow that defines it. Harsh midday sun flattens everything, so for golden, flattering portraits I'll often pull couples aside near sunset, which in a British summer is a generous and forgiving hour for any face.
I'll also direct you towards me or away, ask for tiny chin adjustments, and shoot in quick bursts so we catch the frame where your jaw sits perfectly. You'll never know I'm doing it. That invisible direction is exactly what you're paying a professional for.
Quick Wins for Group Shots and Guest Photos
Couple portraits are easy to control, but family group shots and the inevitable river of guest phone photos are where double chins sneak in. My advice is simple: whenever anyone points a camera at you, find your forehead-forward move and drop your shoulders. It takes half a second and it transforms every casual snap from the day, not just the ones I take.
For the big formal group at the church door or on the lawn, I always position the camera low and ask everyone to lift through the chest rather than crane their necks. If you remember nothing else, remember this: keep the camera below you and your forehead reaching towards it, and you'll like what you see for the rest of your life.
Want to feel genuinely confident in front of the camera on your wedding day?
I guide every couple through posing and angles so you never have to think about it. Let's talk about your day in Cambridgeshire, Suffolk or wherever you're celebrating, and make sure every photo is one you'll love.
Check Your Date →


Yana Skakun
Photographer · England
Professional wedding, family and portrait photographer based in England. Passionate about capturing authentic emotions and timeless moments.
About Yana →doublechinweddingphotos
Photography Guide — Professional Photography in Cambridge & England
Yana Skakun is a professional photographer based in Cambridge, covering weddings, families, and portraits across England. Every session is personal — planned around your story, your people, and the moments that matter most. This guide — How to Avoid a Double Chin in Your Wedding Photos — is part of the photography journal: practical, experience-based advice drawn from real sessions across England. Whether you arrived searching for double or chin, the same care and attention shapes every session Yana photographs.
Professional Photography sessions are available year-round, with bookings open across Cambridge, Ely, Huntingdon, Peterborough, and further afield — East England, London, the Midlands, and beyond. If you have specific questions about wedding, mention it in your enquiry. Get in touch through the contact form above to check availability and discuss your session. Enquiries are welcomed from anywhere in the UK.
Frequently Asked Questions
What camera settings should I use for outdoor portraits?+
For outdoor portraits, shoot in aperture priority mode. Use a wide aperture (f/1.8–f/2.8) to blur the background and isolate your subject. Keep ISO as low as possible in good light. In bright conditions, use a neutral density filter or switch to manual to avoid overexposure at wide apertures.
What is the golden hour in photography?+
Golden hour is the period roughly 30–60 minutes after sunrise and before sunset. The sun is low in the sky, producing warm, soft, directional light that flatters skin tones and creates beautiful long shadows. It's widely considered the best natural light for portrait and outdoor photography.
How do you get sharp photos in low light?+
In low light, increase your ISO (accepting some grain), use the widest aperture your lens allows, and slow your shutter speed to the slowest you can hand-hold without camera shake (roughly 1/focal length as a guide). Use image stabilisation if available, and consider a tripod for static subjects.
What is the rule of thirds in photography?+
The rule of thirds divides the frame into a 3×3 grid. Placing your subject on one of the four intersection points — rather than dead centre — creates a more dynamic, visually interesting composition. It's a guideline, not a rule: some of the most powerful images break it deliberately.
How do you edit photos to look professional?+
Professional editing starts with shooting in RAW format. In Lightroom or similar software, correct exposure, white balance, and contrast first. Recover shadow and highlight detail. Apply gentle colour grading for mood. Be conservative with skin retouching — the goal is natural enhancement, not transformation. Consistency across a set of images is what separates professional from amateur editing.
Continue Reading
Related Articles


Get in Touch
Ready to Book Your Session?
Get in touch to discuss your vision — I'll reply within 24 hours.