Yana Skakun

Why Midday Sun is Harsh (And How We Fix It for Wedding Photos)
By Yana Skakun·10 June 2026·6 min read
Every couple dreams of a brilliant blue sky on their wedding day, yet that same cloudless afternoon is the trickiest light I deal with all year. A high-noon ceremony under the summer sun gives you squinting eyes, raccoon shadows under the brow, and blown-out white dresses. The good news? After a decade of shooting weddings across Cambridgeshire and Suffolk, I have a reliable toolkit for turning harsh midday sun into flattering, romantic wedding photos.
Why midday sun is so unkind to faces
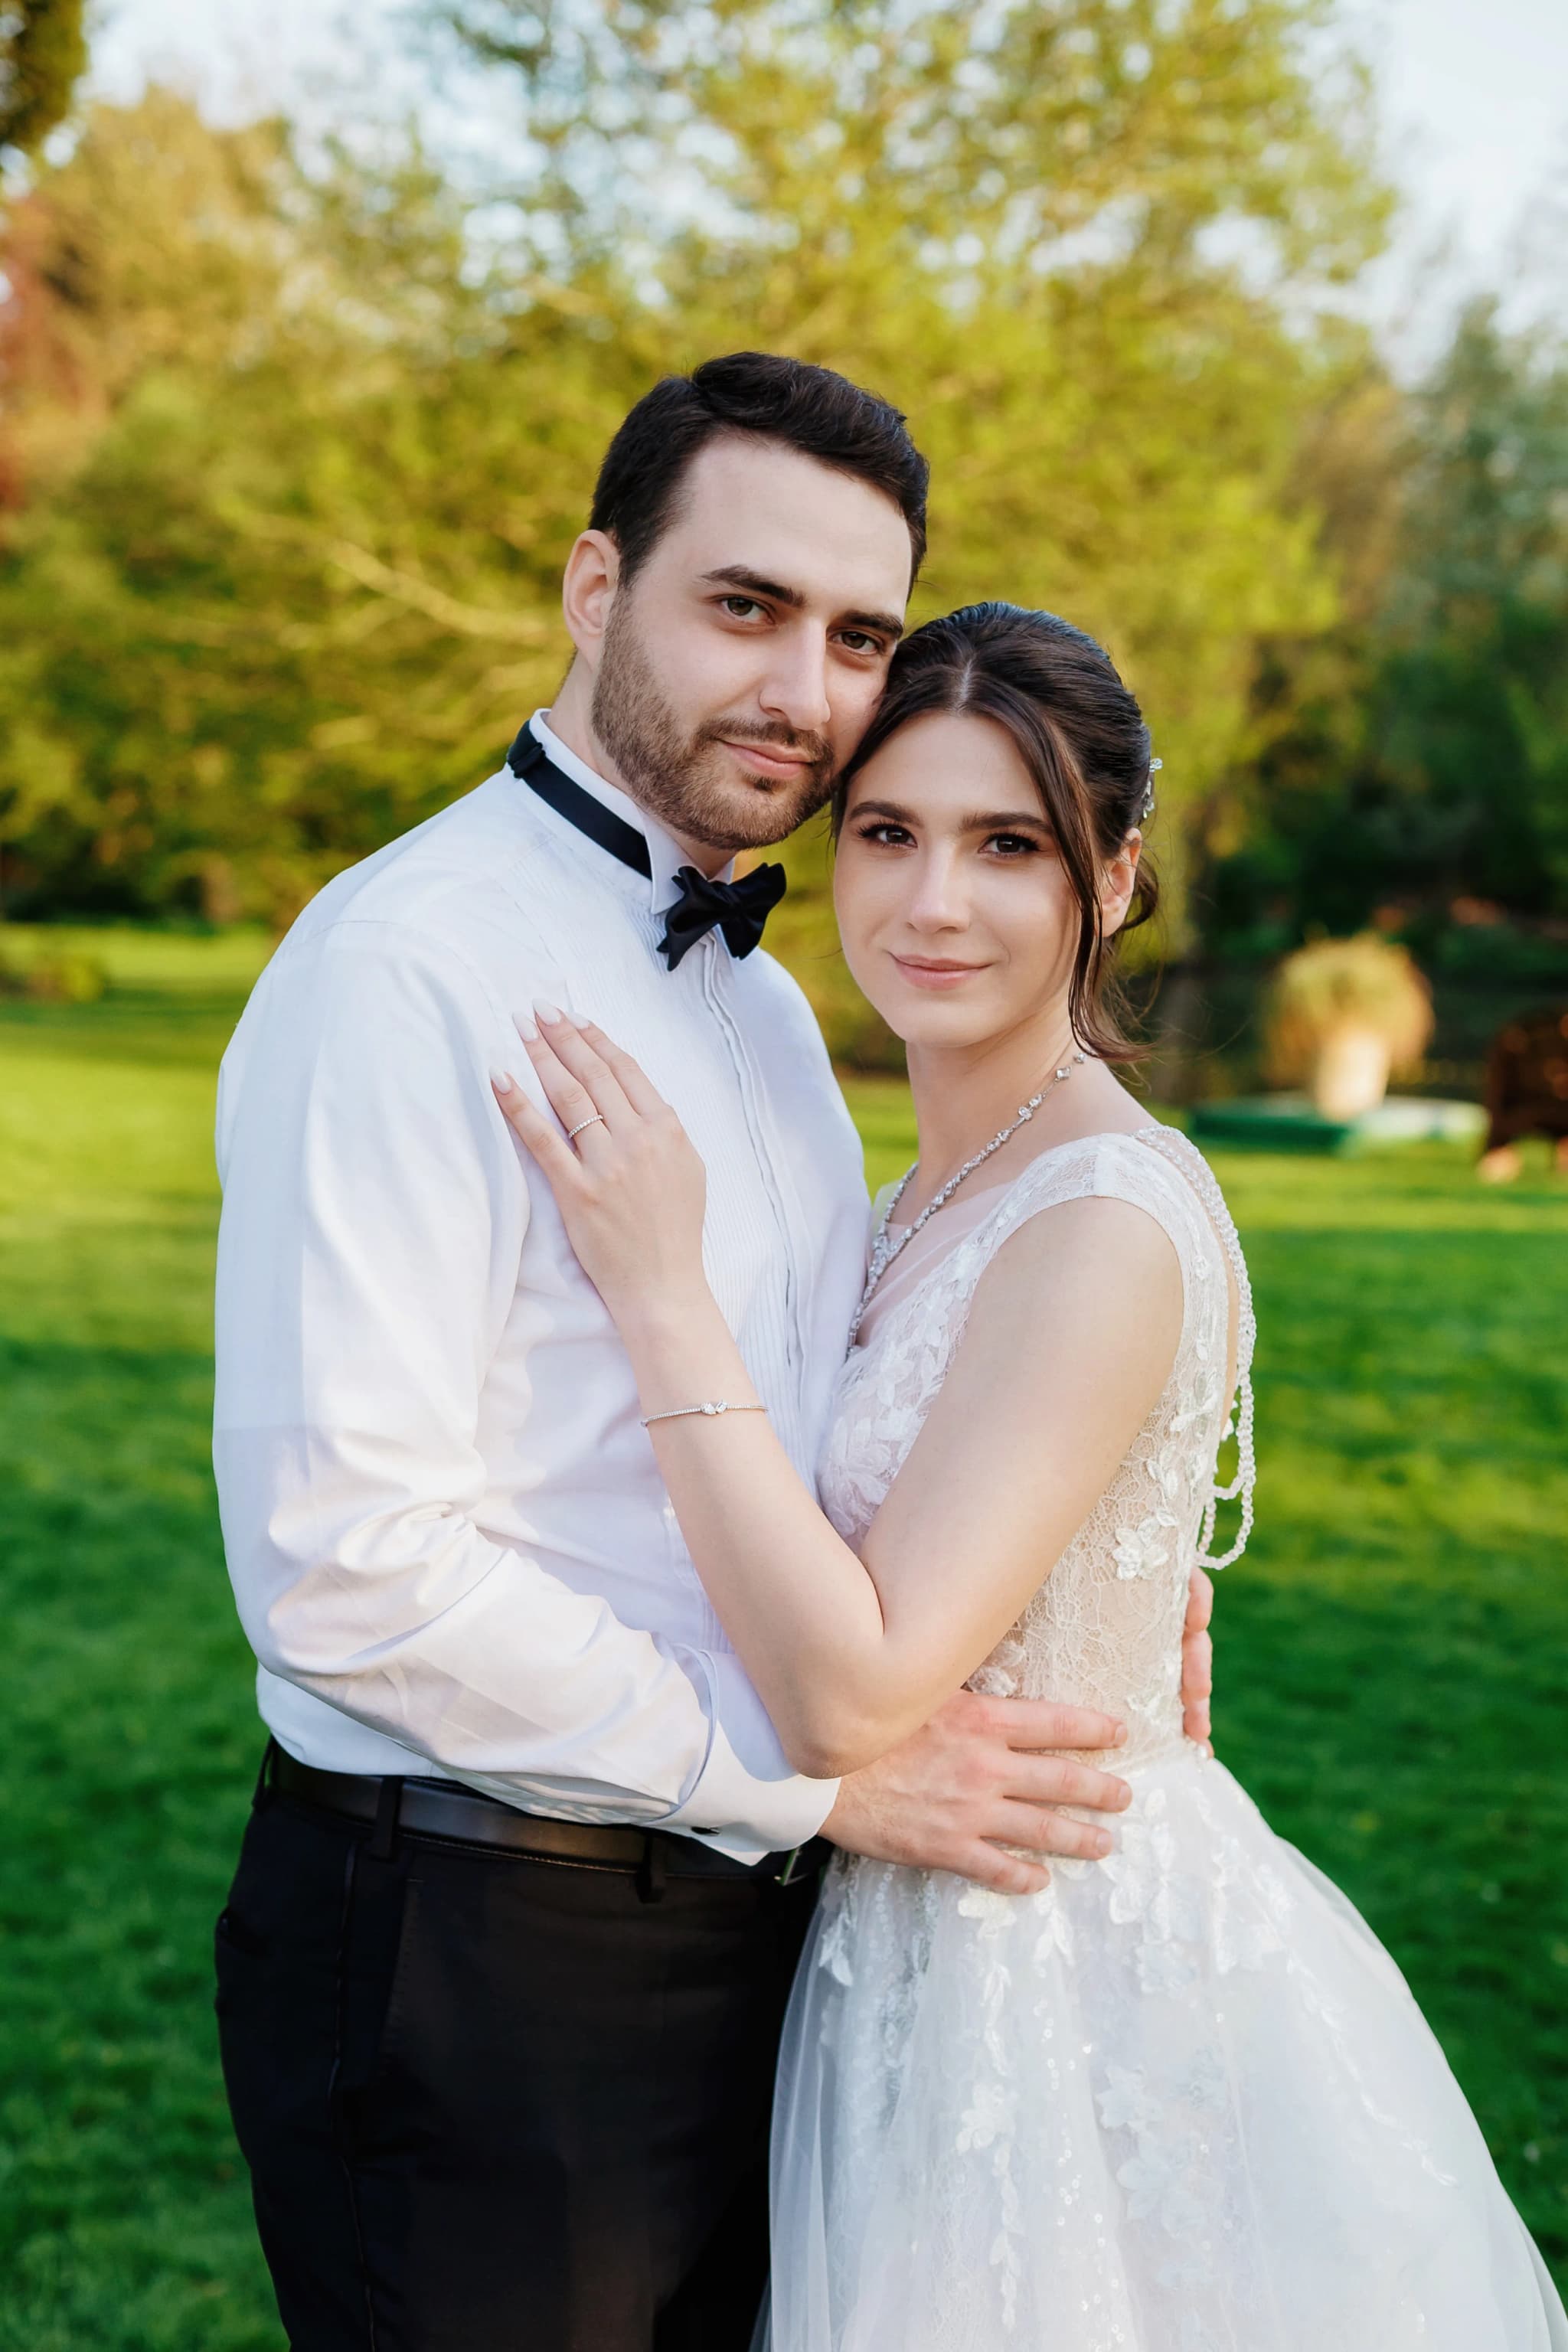
The problem is the angle. When the sun sits almost directly overhead, light falls straight down onto your features. Instead of gently wrapping around a face, it carves deep shadows into the eye sockets, under the nose and beneath the chin. We call them 'panda eyes', and they are the single most common reason an otherwise gorgeous couple looks tired in their photos.
High noon also brings extreme contrast. A camera sensor simply cannot hold detail in both a bright ivory gown and the dark recesses of a shaded face at the same time. Push for the dress and the eyes vanish; expose for the eyes and the dress turns into a featureless white blob. That dynamic range gap is the technical heart of the midday sun wedding photos problem.
Shade is your best friend
My first move is always to find open shade. The moment I move a couple under a tree canopy, a pergola, a stone archway or even the shadow side of a barn, that brutal overhead light becomes soft and directional. Suddenly the eyes are lit, the skin glows, and the contrast drops to something a camera can actually handle.
Open shade matters more than full shade. I want the couple at the edge of the shadow, facing the open sky, so soft reflected light spills onto their faces from the front. Cambridgeshire venues like an oak-lined drive or the cloistered courtyards you find around the colleges are perfect for this. At a marquee wedding I will happily tuck a couple just inside the doorway and let the open field act as a giant softbox.
Fill flash: the trick most people fear
Flash in daylight sounds counterintuitive, but a touch of off-camera fill is the difference between amateur and professional results at midday. I am not trying to overpower the sun. I am adding just enough light to lift those eye-socket shadows and put a catchlight back into the eyes, so a face reads as bright and alive rather than gaunt.
The technique is gentle. I expose for the sky and background first, keeping that lovely blue, then dial the flash down a stop or so below ambient and bounce or diffuse it. Done well, nobody looking at the picture can tell flash was used at all. It simply looks like the couple stepped into kinder light. This is why I always carry portable lighting even to a sun-drenched July wedding in Suffolk.
My on-the-day toolkit for harsh sun
Here is exactly what I reach for when the forecast promises clear skies and the ceremony is booked for the middle of the day. Each of these earns its place in the bag.
- ◆Open shade: The first port of call, lifting couples out of direct overhead light into soft, even illumination.
- ◆Off-camera flash: A diffused speedlight set below ambient to fill shadows and restore catchlights without killing the blue sky.
- ◆Backlighting: Turning couples so the sun sits behind them, creating a glowing rim of light and shielding their eyes.
- ◆A scrim or diffuser: A large translucent panel held overhead to soften the sun directly, ideal for tight group shots.
- ◆Positioning: Angling faces away from the sun and tilting chins down slightly so shadows fall flatteringly.
- ◆Timing: Negotiating a few key portraits for golden hour later, when the light does half the work for me.
Positioning and timing make the rest easy
When shade and flash are not available, positioning saves the day. I turn couples so the sun is behind them, using it as a backlight that haloes the hair and shoulders while their faces sit in gentle, even shadow. I then add a reflector or a kiss of flash from the front. It is a flattering, editorial look that works beautifully in an open Cambridgeshire field with no tree in sight.
I also plan timing with my couples well before the day. If your ceremony genuinely has to run at noon, I will suggest we steal twenty minutes for portraits in the late afternoon, when the sun drops and softens. That small adjustment to the schedule consistently produces the warm, glowing images couples fall in love with. A little planning turns the harshest light of the day into a non-issue.
Planning a sunny midday wedding in Cambridgeshire or Suffolk?
I would love to help you plan light and timing so harsh sun never spoils a single frame. Let's talk through your venue, your schedule and the photos that matter most to you.
Check Your Date →


Yana Skakun
Photographer · England
Professional wedding, family and portrait photographer based in England. Passionate about capturing authentic emotions and timeless moments.
About Yana →middaysunweddingphotos
Photography Guide — Professional Photography in Cambridge & England
Yana Skakun is a professional photographer based in Cambridge, covering weddings, families, and portraits across England. Every session is personal — planned around your story, your people, and the moments that matter most. This guide — Why Midday Sun is Harsh (And How We Fix It for Wedding Photos) — is part of the photography journal: practical, experience-based advice drawn from real sessions across England. Whether you arrived searching for midday or sun, the same care and attention shapes every session Yana photographs.
Professional Photography sessions are available year-round, with bookings open across Cambridge, Ely, Huntingdon, Peterborough, and further afield — East England, London, the Midlands, and beyond. If you have specific questions about wedding, mention it in your enquiry. Get in touch through the contact form above to check availability and discuss your session. Enquiries are welcomed from anywhere in the UK.
Frequently Asked Questions
What camera settings should I use for outdoor portraits?+
For outdoor portraits, shoot in aperture priority mode. Use a wide aperture (f/1.8–f/2.8) to blur the background and isolate your subject. Keep ISO as low as possible in good light. In bright conditions, use a neutral density filter or switch to manual to avoid overexposure at wide apertures.
What is the golden hour in photography?+
Golden hour is the period roughly 30–60 minutes after sunrise and before sunset. The sun is low in the sky, producing warm, soft, directional light that flatters skin tones and creates beautiful long shadows. It's widely considered the best natural light for portrait and outdoor photography.
How do you get sharp photos in low light?+
In low light, increase your ISO (accepting some grain), use the widest aperture your lens allows, and slow your shutter speed to the slowest you can hand-hold without camera shake (roughly 1/focal length as a guide). Use image stabilisation if available, and consider a tripod for static subjects.
What is the rule of thirds in photography?+
The rule of thirds divides the frame into a 3×3 grid. Placing your subject on one of the four intersection points — rather than dead centre — creates a more dynamic, visually interesting composition. It's a guideline, not a rule: some of the most powerful images break it deliberately.
How do you edit photos to look professional?+
Professional editing starts with shooting in RAW format. In Lightroom or similar software, correct exposure, white balance, and contrast first. Recover shadow and highlight detail. Apply gentle colour grading for mood. Be conservative with skin retouching — the goal is natural enhancement, not transformation. Consistency across a set of images is what separates professional from amateur editing.
Continue Reading
Related Articles


Get in Touch
Ready to Book Your Session?
Get in touch to discuss your vision — I'll reply within 24 hours.